
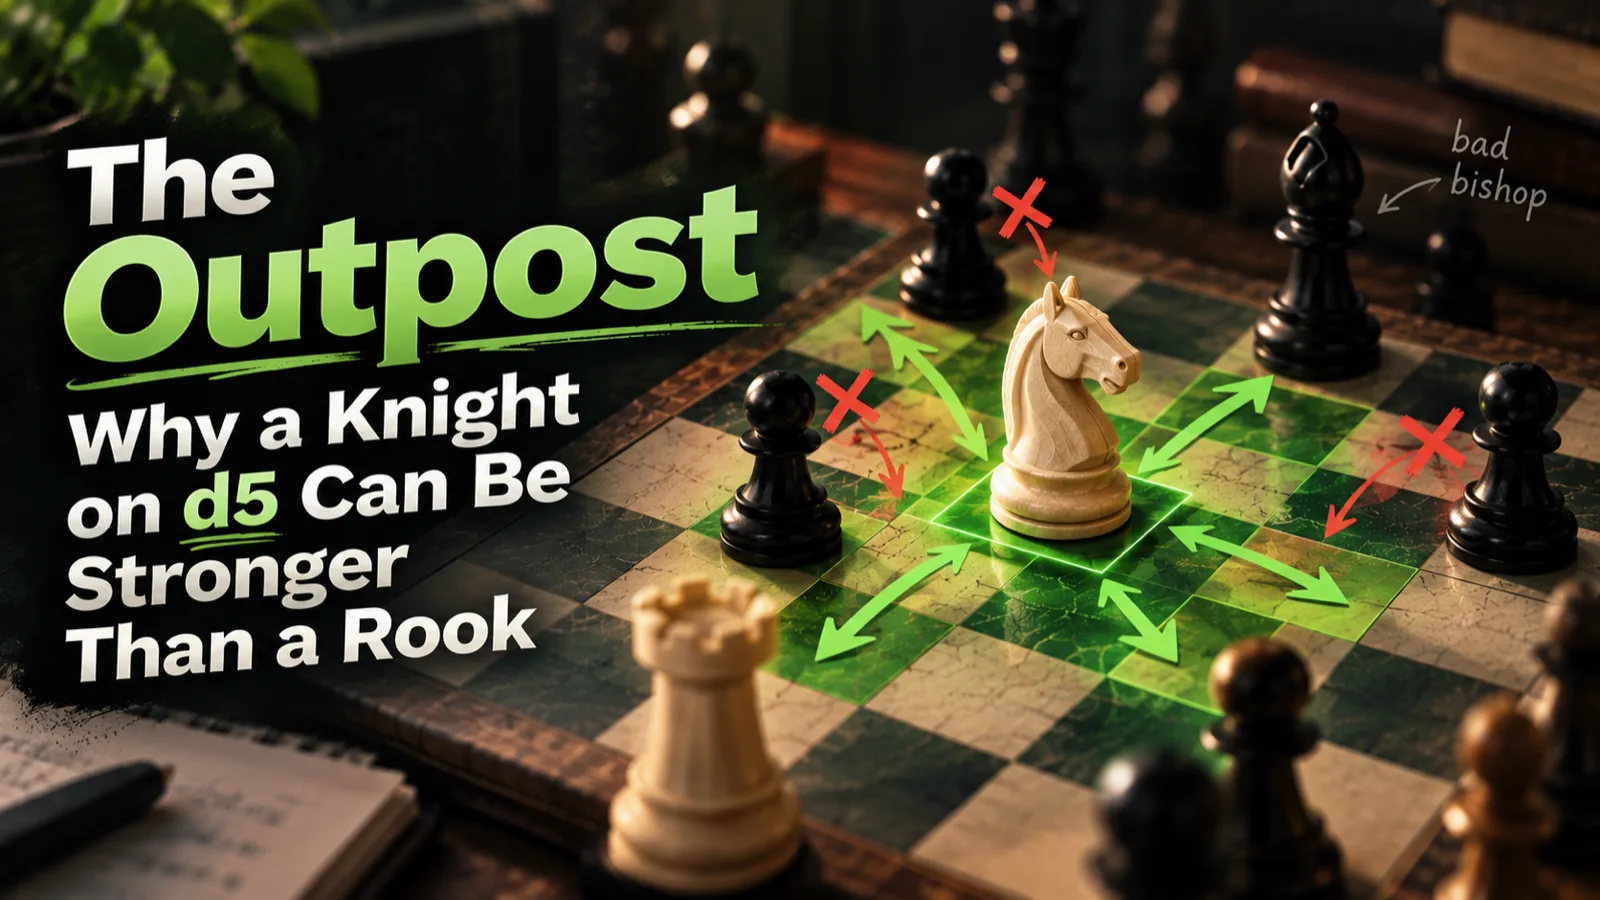
Move twenty-five. You have a rook; your opponent has a knight on d5. On paper you're ahead. In practice you have nothing to do: your rook is stuck behind its own pawns, while that knight hits eight squares in your camp and nothing can chase it away. That is a knight outpost — and it quietly beats players who count pieces by points.
Five points against three is what pieces are worth on an empty board. On a real board a piece is worth what it does. A knight on a great square does more than a rook with nowhere to go.
An outpost is a square no pawn can ever hit
An outpost in chess is a square your opponent's pawns can't attack — not now, not later. Pawns only move forward. Once the pawns on the neighbouring files have walked past the square or disappeared, it's permanent. A piece on that square can still be traded off, but it can't be kicked by a pawn.
The ideal outpost is also supported by one of your own pawns. Then trading on it is a bad deal for your opponent: they give up a piece for yours, and another of your pieces lands on the same square. That's why players usually tolerate a strong central square instead of challenging it.
A hole is created by a single pawn move
Nobody hands you an outpost on purpose. It appears when your opponent pushes a pawn and stops guarding the square in front of it. The best-known example is the Najdorf Sicilian.
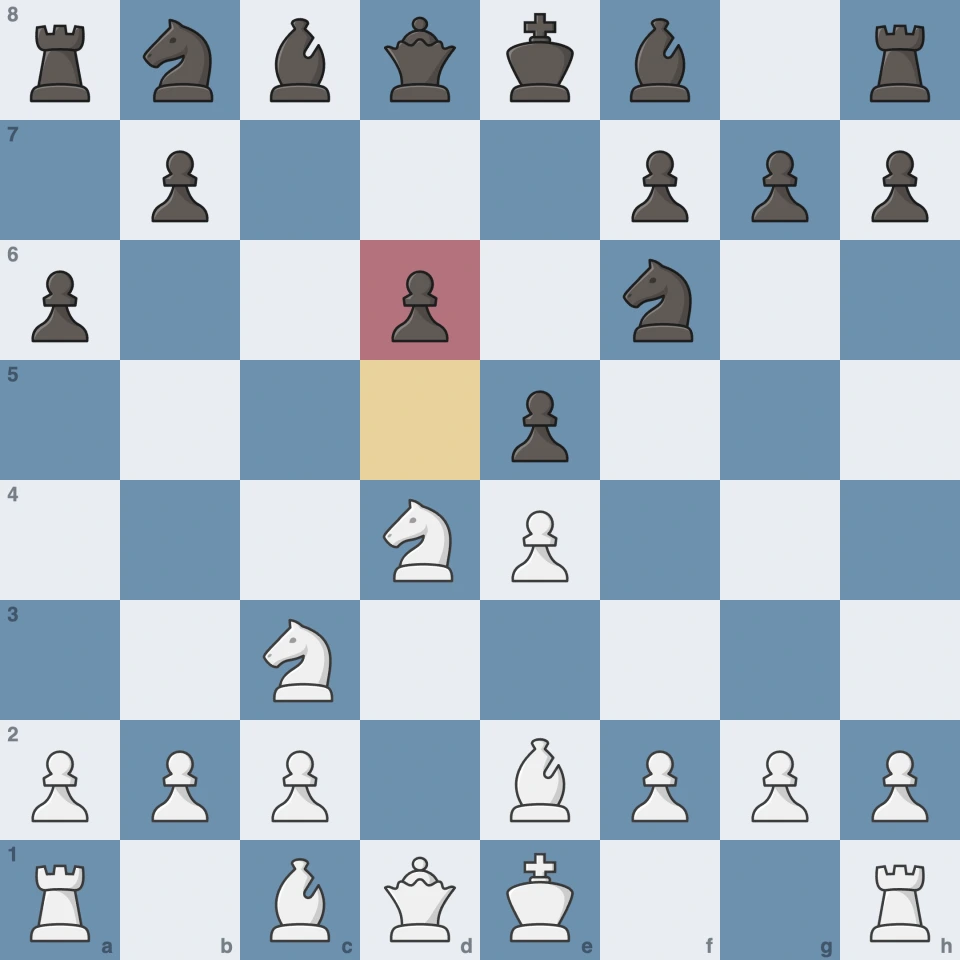
6...e5 is a good move: it kicks the knight out of the centre and grabs space. But from this moment no black pawn defends d5. The c-pawn was traded, the e-pawn walked past. Stockfish calls the position equal (+0.26), so Black got fair value for the hole. You can pay with a hole — just know the price.
This is also how you spot an outpost three moves before a knight lands on it. After every pawn move your opponent makes, ask: which squares will this pawn never defend again? The two squares diagonally in front of where it used to stand are now yours — unless a neighbouring pawn can still reach them.
A knight needs a route, not a wish
Seeing the square isn't enough; you have to get there. Knights are slow, so plan the three-move route right away, before your opponent brings defenders.
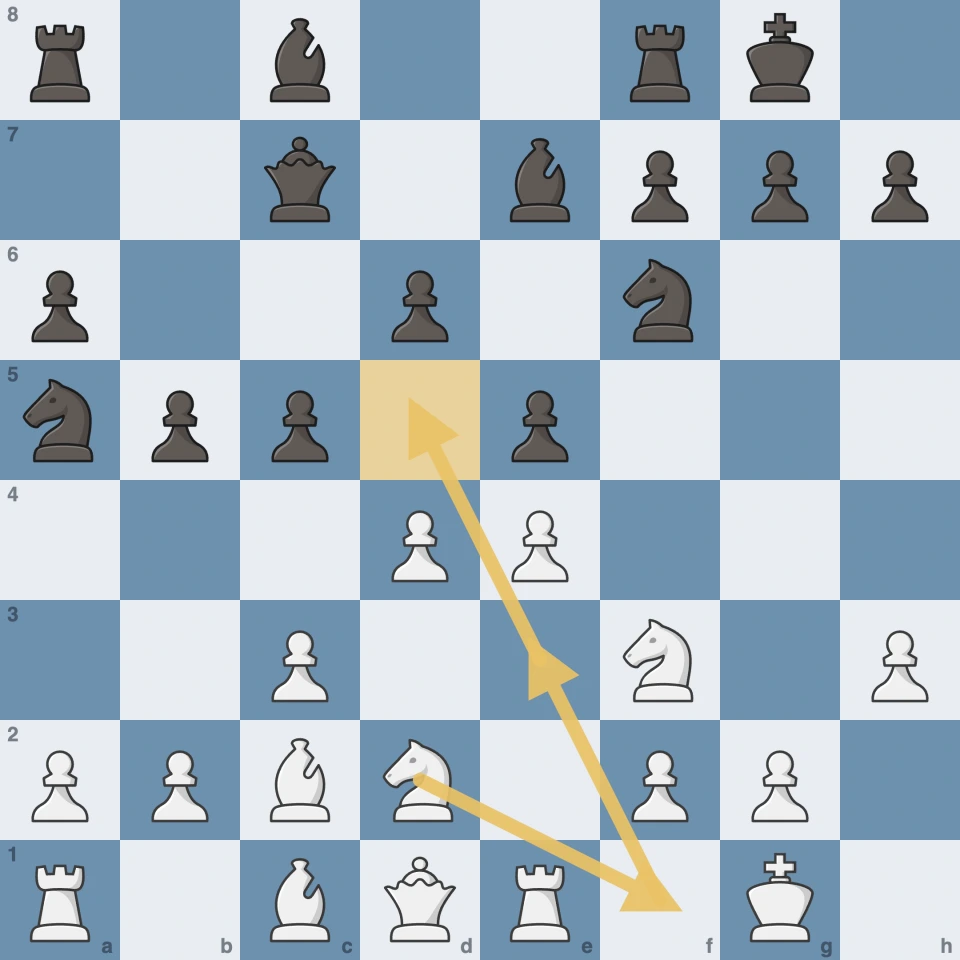
The d2–f1–e3 manoeuvre is one of the oldest in chess. The knight looks passive, but three moves later it stands where Black's pawns can never reach. That's the difference between a plan and a hope: you know where the piece is going before it moves.
Put a knight on the outpost, not just any piece
An outpost only protects against pawns. Enemy pieces can still reach it, so it matters who lives there.
- A queen on an outpost is pointless: any knight or bishop chases it away and you lose a tempo.
- A rook has to leave as soon as a minor piece attacks it, or it loses the exchange.
- A bishop on d5 often stares into enemy pawns and hits nothing.
- A knight is the perfect tenant. A bishop attacking it doesn't scare it (the trade is even), and from d5 it hits c7, e7, f6 and b6 — deep inside the enemy camp.
One more detail. If your opponent does trade on the outpost, recapture with a piece when you can. A pawn that lands on d5 plugs the square itself: the outpost is gone and you just have a pawn.
Good knight versus bad bishop
This is where an outpost becomes stronger than a rook. d5 is a light square, so only your opponent's light-squared bishop can ever challenge the knight there. Once that bishop is traded, the knight on d5 has no enemies at all. The dark-squared bishop stuck behind pawns on d6 and e5 becomes a bad bishop: it stares at its own pawns and can never touch the knight.
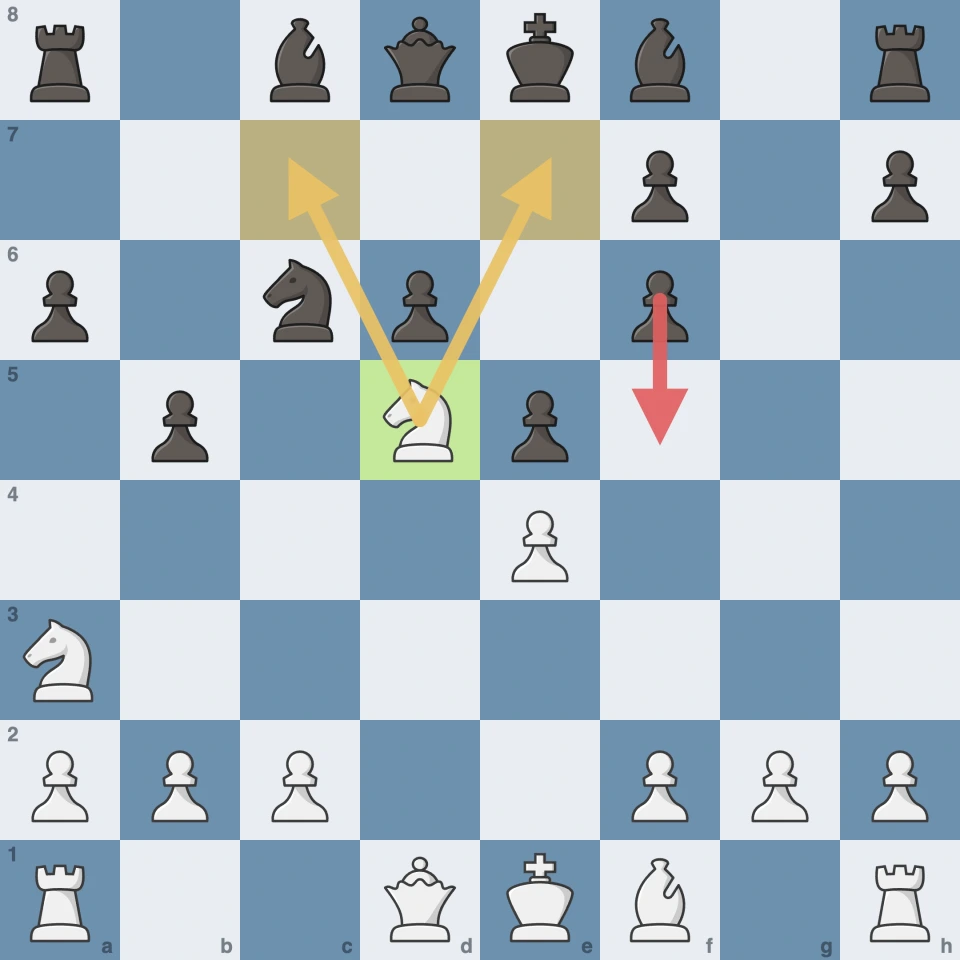
So strong players don't hunt the knight itself — they hunt the pieces that could trade it. In the Sveshnikov, White gives up a bishop for the f6-knight for one reason: to remove the guard of d5. Petrosian was famous for giving up the exchange — a rook for a minor piece — to get a knight like this, or to get rid of an enemy one.
What you pay for a hole
The Sveshnikov shows the other side too. Black gives up d5 on purpose, accepts doubled pawns — and still plays this line at the very top level. Stockfish calls it equal (+0.32). In return Black has the bishop pair, the half-open g-file, and the f6–f5 break that hits the e4-pawn.
That gives you a rule for your own moves. Before a pawn move that gives up a square, ask: what do I get for it — time, space, an attack? If there's no answer, you're just building a home for your opponent's knight. If there is one, learn that break: without it, the hole stays a hole, only now it's yours. Related reading: pawn weaknesses — the backward d6-pawn and the d5 outpost are two sides of the same move.
An outpost isn't a trick; it's a way of thinking. Space grows out of squares like this. And the rook that was losing to a knight at the start of this article starts winning the moment it finds an open file.
In the 99chess openings trainer, every move of the London System and the Bird comes with a "why" — and the knight on e5 is explained exactly as an outpost: what holds it, and why your opponent can't kick it.
Pawns don't move backwards. So every pawn move asks two questions: where did it go — and what did it leave behind for good?